No edit summary Tag: rte-wysiwyg |
No edit summary |
||
| (38 intermediate revisions by 7 users not shown) | |||
| Line 4: | Line 4: | ||
The gallery is growing. Come back soon! |
The gallery is growing. Come back soon! |
||
| + | |||
| − | ==How-To Videos== |
||
| + | '''[[Slime_Time_Bubble_Putty|SLIME TIME BUBBLE PUTTY]]''' : Bounce it, fold it, strrrretch it, tie it in a knot or tie it in a bow, knead it like dough or break it into pieces and then roll it into a ball again. Then, after all that, you can make HUGE OUTDOOR '''BUBBLES'''!! Get the [[Slime_Time_Bubble_Putty|step-by-step directions]] . |
||
| + | |||
| + | '''HOW TO MAKE YOUR OWN TRIPOD ADAPTOR''': See Rick's [https://www.facebook.com/rick.findley/media_set?set=a.2924501690951566&type=3 Facebook post]. |
||
| + | |||
| + | {{ClearFloat}} |
||
[[File:2016RickECigHowTo.jpg|thumb|left|300px|3 Part Video Series: 2016 DIY Fogger|link=Rick's_Build_A_Fogger_How_To_2016]] |
[[File:2016RickECigHowTo.jpg|thumb|left|300px|3 Part Video Series: 2016 DIY Fogger|link=Rick's_Build_A_Fogger_How_To_2016]] |
||
[[File:BUILD A VAPOR MAKER FOR BUBBLES USING ALMOST ANYTHING|thumb|right|300px]] |
[[File:BUILD A VAPOR MAKER FOR BUBBLES USING ALMOST ANYTHING|thumb|right|300px]] |
||
| + | |||
| + | |||
| + | |||
| + | |||
| + | |||
{{ClearFloat}} |
{{ClearFloat}} |
||
[[File:Giant Straw Bubble Maker (3" diam. PVC tube)|thumb|left|300px|3" PVC pipe. You do not have to put your mouth to the opening of the tube to create a stream of bubbles]] |
[[File:Giant Straw Bubble Maker (3" diam. PVC tube)|thumb|left|300px|3" PVC pipe. You do not have to put your mouth to the opening of the tube to create a stream of bubbles]] |
||
[[File:DIY 2 tier, 51 loop garland|thumb|right|300px|Retractable fishing rod with eyelets. Use the first set of 2 eyelets at the tip to attach garlands to in order to keep the 2 garlands apart. I also include a straw in the middle between the two to separate them also. Use a rectangular trough on a stool to dip in.]] |
[[File:DIY 2 tier, 51 loop garland|thumb|right|300px|Retractable fishing rod with eyelets. Use the first set of 2 eyelets at the tip to attach garlands to in order to keep the 2 garlands apart. I also include a straw in the middle between the two to separate them also. Use a rectangular trough on a stool to dip in.]] |
||
| + | |||
{{ClearFloat}} |
{{ClearFloat}} |
||
| + | [[File:DIY cup and Straw bubble maker|thumb|right|300px|CUP AND FLEXI-STRAW BUBBLE MAKER--I saw this effect online some time ago: I do not know who to attribute it to but it's a very simple concept.]] |
||
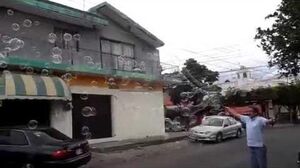
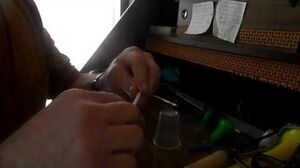
| + | [[File:SIMPLE DIY VAPOR MAKING BEAST FOR BUBBLES (no sound) by Rick Findley-0|thumb|left|335px|Using an ijustS ecig, a straw, a short piece of 1/2" clear tubing and a larger tube that was full of bubble juice with a screw on bubble wand. ]] |
||
| + | |||
| + | {{ClearFloat}} |
||
| + | |||
==How-To Articles and Gallery== |
==How-To Articles and Gallery== |
||
| + | <gallery navigation="true" widths="300" columns="2" spacing="medium" orientation="portrait"> |
||
| ⚫ | |||
| + | KITCHEN STRAINER MAGIV.jpg|KITCHEN STRAINER MAGIC|link=KITCHEN_STRAINER_MULTI-LOOP_WANDS |
||
| + | TURN AN ORDINARY KITCHEN STRAINER INTO A SUPER HOOP.jpg|HOW TO TURN AN ORDINARY KITCHEN STRAINER INTO A SUPER HOOP (Before and After)|link=DIY Simple Hoops from Kitchen Strainers |
||
| + | TROUBLESHOOTING A DEFLATING WADING POOL.jpg|TROUBLESHOOTING A DEFLATING WADING POOL|link=DIY_fix_for_a_KIB_Moat_Leaky_Valve |
||
| + | 28.jpg|HOW TO BUILD A MULTI-LOOP BUBBLE WAND|link=DIY Multi-Loop Bubble Wand--PEX Design |
||
| + | 01.jpg|HOW TO BUILD A MULTI LOOP WAND WITH EASY TO FIND MATERIALS|link=DIY MULTI-LOOP BUBBLE WAND USING CORD COVERED ZIP-TIES Part II |
||
| + | DSC04707.JPG|DIY VAPOR MAKER--A sleak horizontal design for 0-15W non sub-ohm ecigs|link=DIY HORIZONTAL VAPOR MAKER 0-15W |
||
| + | 12890909_972830039452084_1971584089064051499_o.jpg|DIY VAPOR MAKER--Vertical design for 15W-30W sub-ohm ecigs|link=DIY_Vertical_Style_Vapor_Maker_(15W-40W_) |
||
| + | 12823426_962189293849492_1930733043643604437_o.jpg|DIY VAPOR MAKER-Open vertical design for 40W-60+W sub-ohm ecigs|link=DIY Vapor Maker - Super Sub-Ohm (iJust2) |
||
| + | ADDING HANDLES.jpg|Add detachable threaded handles to your wands|link=DIY DETACHABLE THREADED HANDLES FOR BUBBLE WANDS |
||
| + | SWITCH01.jpg|New simpler way to attach a larger exit tube to the 0-15W horizontal vapor maker|link=SIMPLE NEW DIMENSION TO THE 0-15W HORIZINTAL VAPOR MAKER DESIGN |
||
| + | v1.jpg|DIY Velcro Straps for Bubble Gear|link=DIY Velcro Straps |
||
| + | 15589588 1165464056855347 5118072395203163479 n.jpg|Creating the String of Pearls|link=String of Pearls Tutorial |
||
| + | SIX.jpg|Simple battery button safeguard|link=Ecig Battery Button Safeguard |
||
| + | 2tier8.jpg|Making a 2 tier garland work--also see demo video in How-To Videos section at the beginning of this gallery|link=2 Tier Garland |
||
| + | G1.jpg|UPDATED ANTI FOLD-OVER GARLAND DESIGN FOR LG AND SM LOOP GARLANDS PART I & II|link=ANTI FOLD-OVER GARLAND DESIGN |
||
| + | PC1.jpg|UPDATED PULL CHAIN SWIVEL DESIGNS|link=PULL CHAIN SWIVEL |
||
| + | hoops.jpg|DIY Hoop Making Made Simple|link=HOOP MAKING MADE SIMPLE |
||
| + | main foto.jpg|Simple DIY Procedure for KIB Travel Moats Large and Small|link=Simple DIY Inflatable KIB Travel Moats |
||
| + | 1 one.jpg|How To Minimize Large Hoop Flexing|link=Minimizing Large Hoop Flexing |
||
| + | 1one.jpg|Simple no tangle, no twist small tri-string design|link=Cheap and Easy No Twist No Tangle Small Tri-String Design |
||
| + | Foamer11.JPG|DIY Foamer|link=DIY Foamer--Attractive, Simple and Effective |
||
| + | Fogger 1g.jpg|Super DIY Fogger--also see video in How-To Videos at the beginning of this gallery|link=DIY Super Fogger |
||
| + | bpinro.jpg|Bubble Putty Part I and II--non toxic eco/kid friendly|link=DIY Bubble Putty Part I and II--non toxic eco/kid friendly |
||
| + | RAD.jpg|RAD: Rick's Alternative Detergent - DIY eco and kid-friendly bubble juice from scratch.|link=RAD_Recipe |
||
| + | </gallery> |
||
| + | |||
| ⚫ | |||
[[Category:Equipment]] |
[[Category:Equipment]] |
||
[[Category:Rick Findley]] |
[[Category:Rick Findley]] |
||
Revision as of 21:40, 14 July 2020
Rick Findley has invented, and continues to invent, wonderful bubble equipment. This page is a starting point for exploring his inventions and Do-It-Yourself (DIY) methods. Click on any photo below for its complete step-by-step instructions.
One of the challenges in building your own bubble equipment is sourcing materials. If you cannot find the exact materials shown, use your creativity and these step-by-step procedures as guides to your own solutions.
The gallery is growing. Come back soon!
SLIME TIME BUBBLE PUTTY : Bounce it, fold it, strrrretch it, tie it in a knot or tie it in a bow, knead it like dough or break it into pieces and then roll it into a ball again. Then, after all that, you can make HUGE OUTDOOR BUBBLES!! Get the step-by-step directions .
HOW TO MAKE YOUR OWN TRIPOD ADAPTOR: See Rick's Facebook post.
3 Part Video Series: 2016 DIY Fogger
BUILD A VAPOR MAKER FOR BUBBLES USING ALMOST ANYTHING
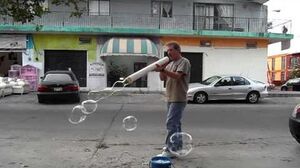
Giant Straw Bubble Maker (3" diam. PVC tube)
3" PVC pipe. You do not have to put your mouth to the opening of the tube to create a stream of bubbles
DIY 2 tier, 51 loop garland
Retractable fishing rod with eyelets. Use the first set of 2 eyelets at the tip to attach garlands to in order to keep the 2 garlands apart. I also include a straw in the middle between the two to separate them also. Use a rectangular trough on a stool to dip in.
DIY cup and Straw bubble maker
CUP AND FLEXI-STRAW BUBBLE MAKER--I saw this effect online some time ago: I do not know who to attribute it to but it's a very simple concept.
SIMPLE DIY VAPOR MAKING BEAST FOR BUBBLES (no sound) by Rick Findley-0
Using an ijustS ecig, a straw, a short piece of 1/2" clear tubing and a larger tube that was full of bubble juice with a screw on bubble wand.
How-To Articles and Gallery
")
")
")
")
")
")
 (1,003 KB)")
 (303 KB)")
")
")
")
")
")
")
")
")
")
")
")
")
")
")
")
")
