(→Attachment Styles: expand section) |
(→Attachment Styles: add pictures) |
||
| Line 59: | Line 59: | ||
There are many ways of attaching the bubble "loop" to the handles. There are two main styles (with many subvariations). |
There are many ways of attaching the bubble "loop" to the handles. There are two main styles (with many subvariations). |
||
| − | [[File:Brianl_dipstix_DSCN4734.JPG|thumb|300px|This homemade wand has the loop directly connected to the handles. Find out how to make it [[Making_a_Super_Simple_Tri-String|here]]]]Some tri-string wands have the loop connected directly to the handles. Some "direct connect" wands have an eyehook, clip, swivel, or some combination directly connected to the wand to which the loop is attached.{{ClearFloat}} |
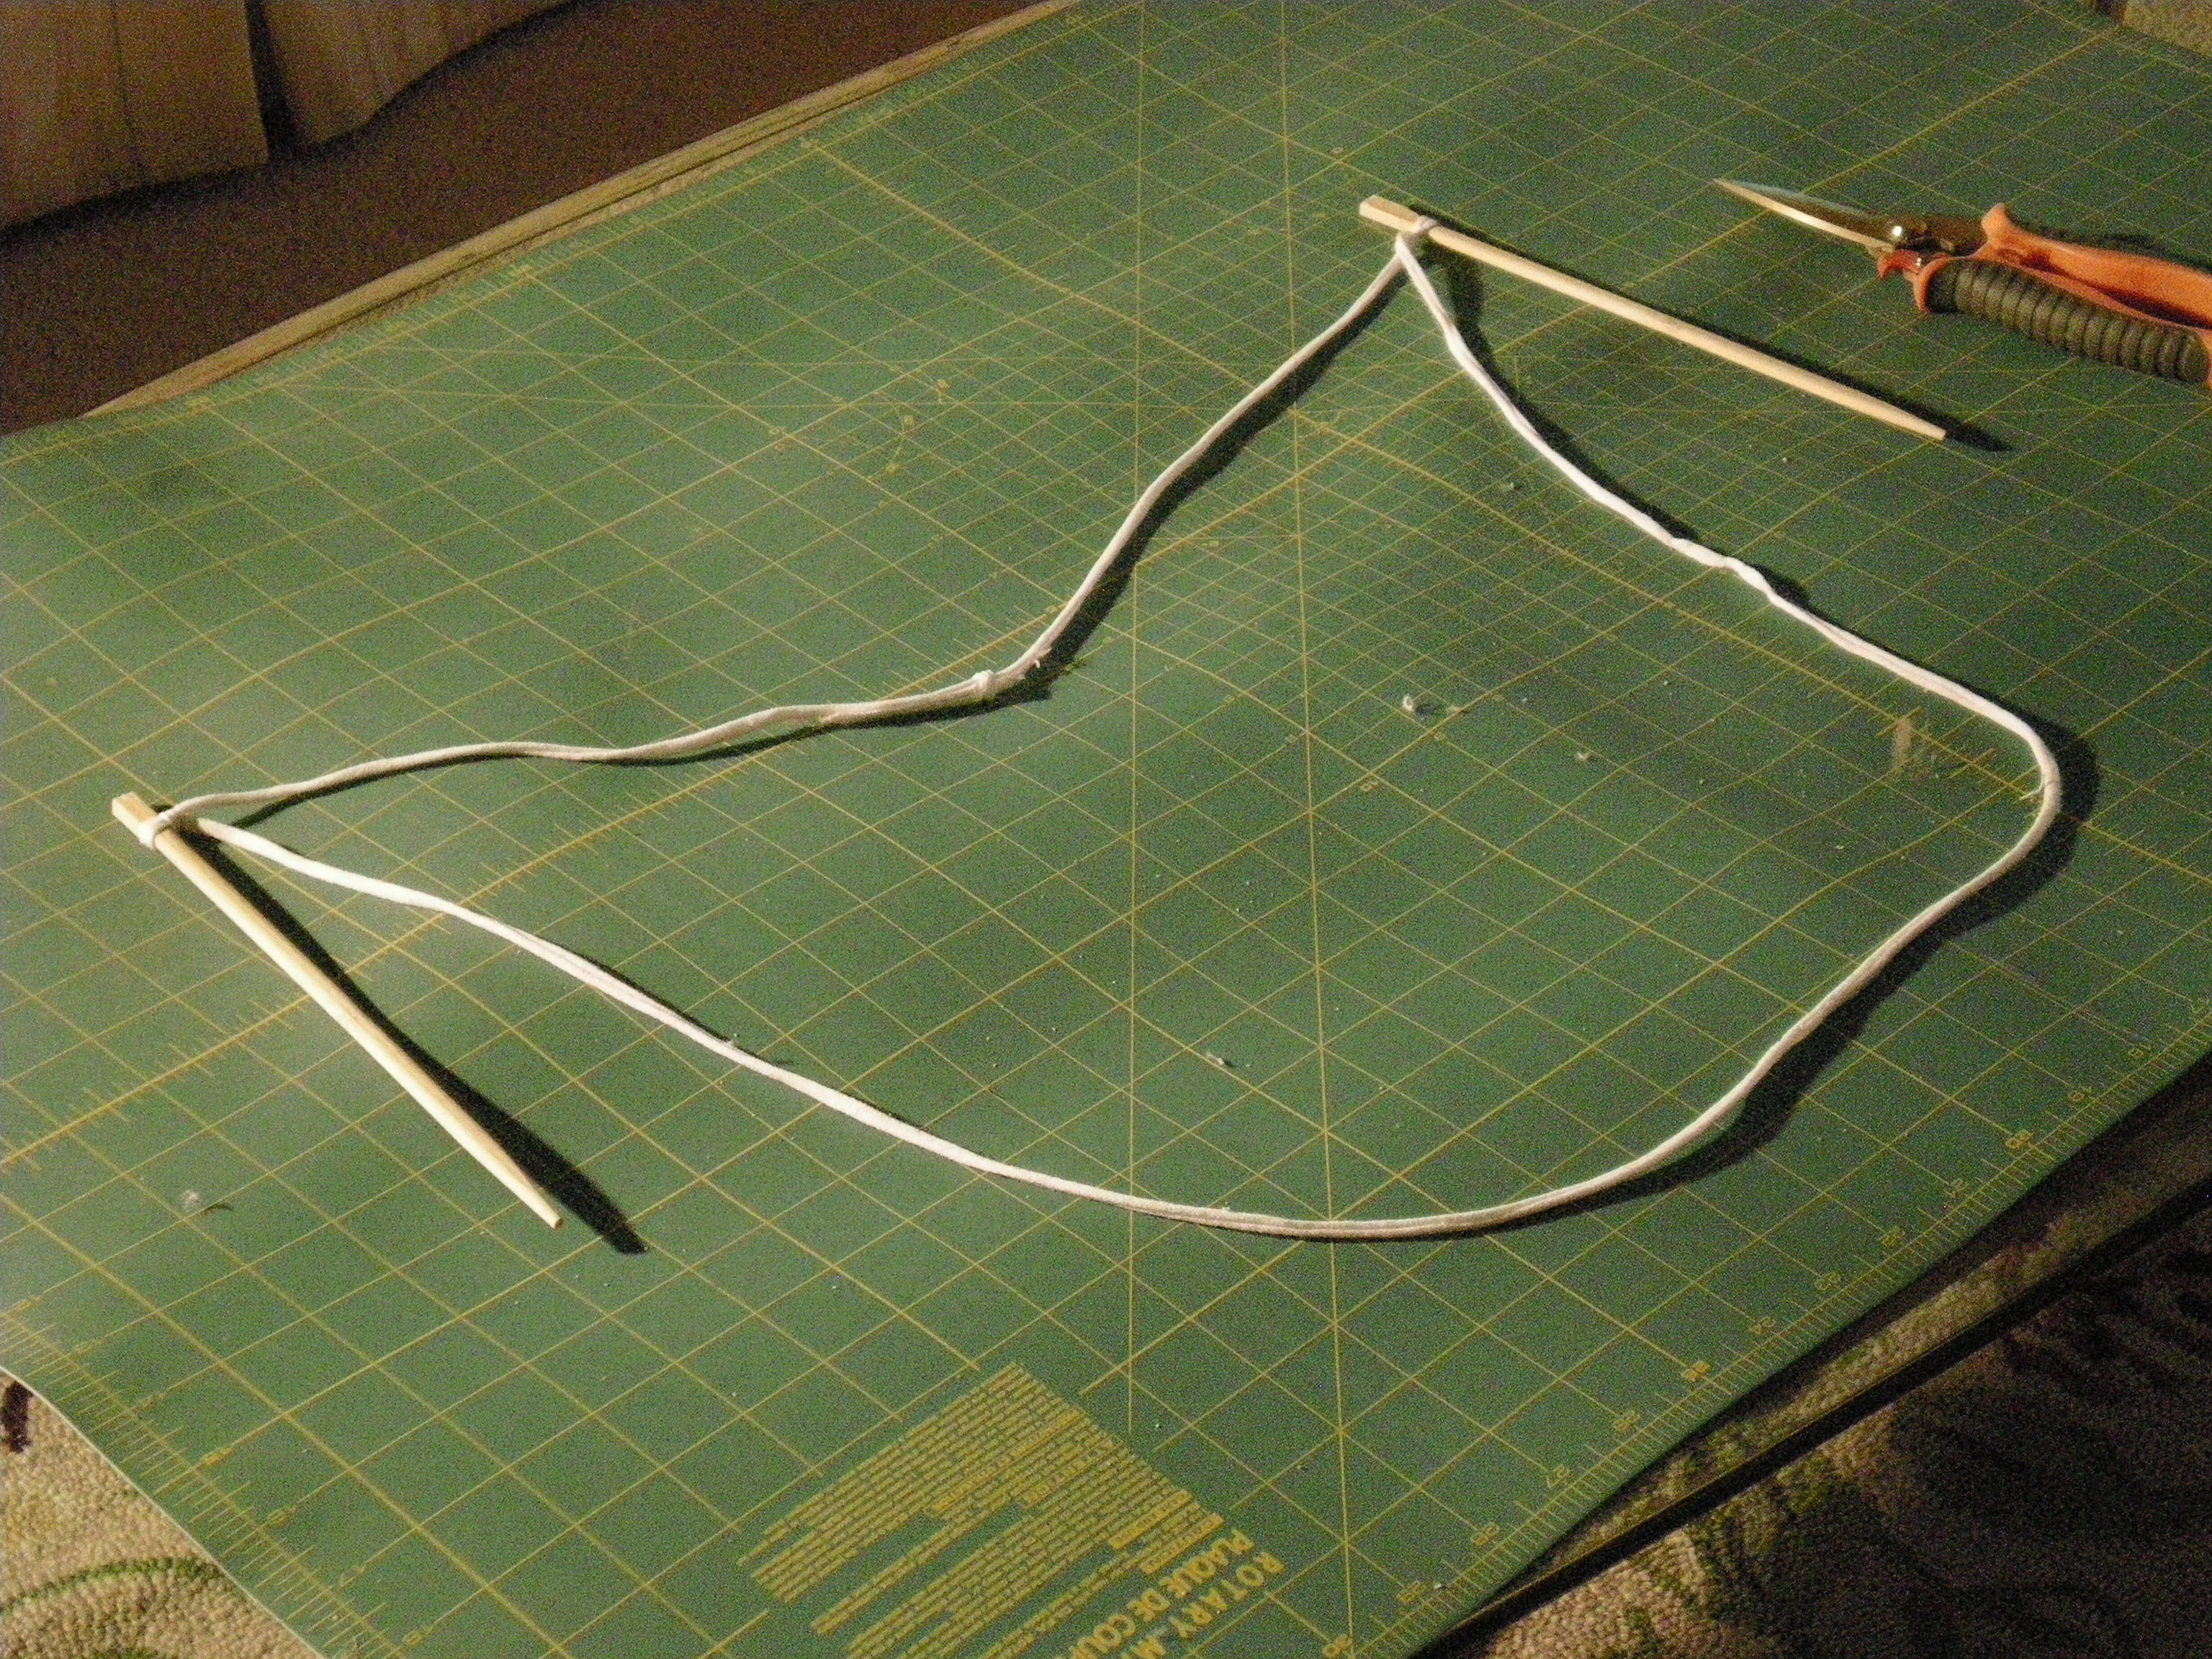
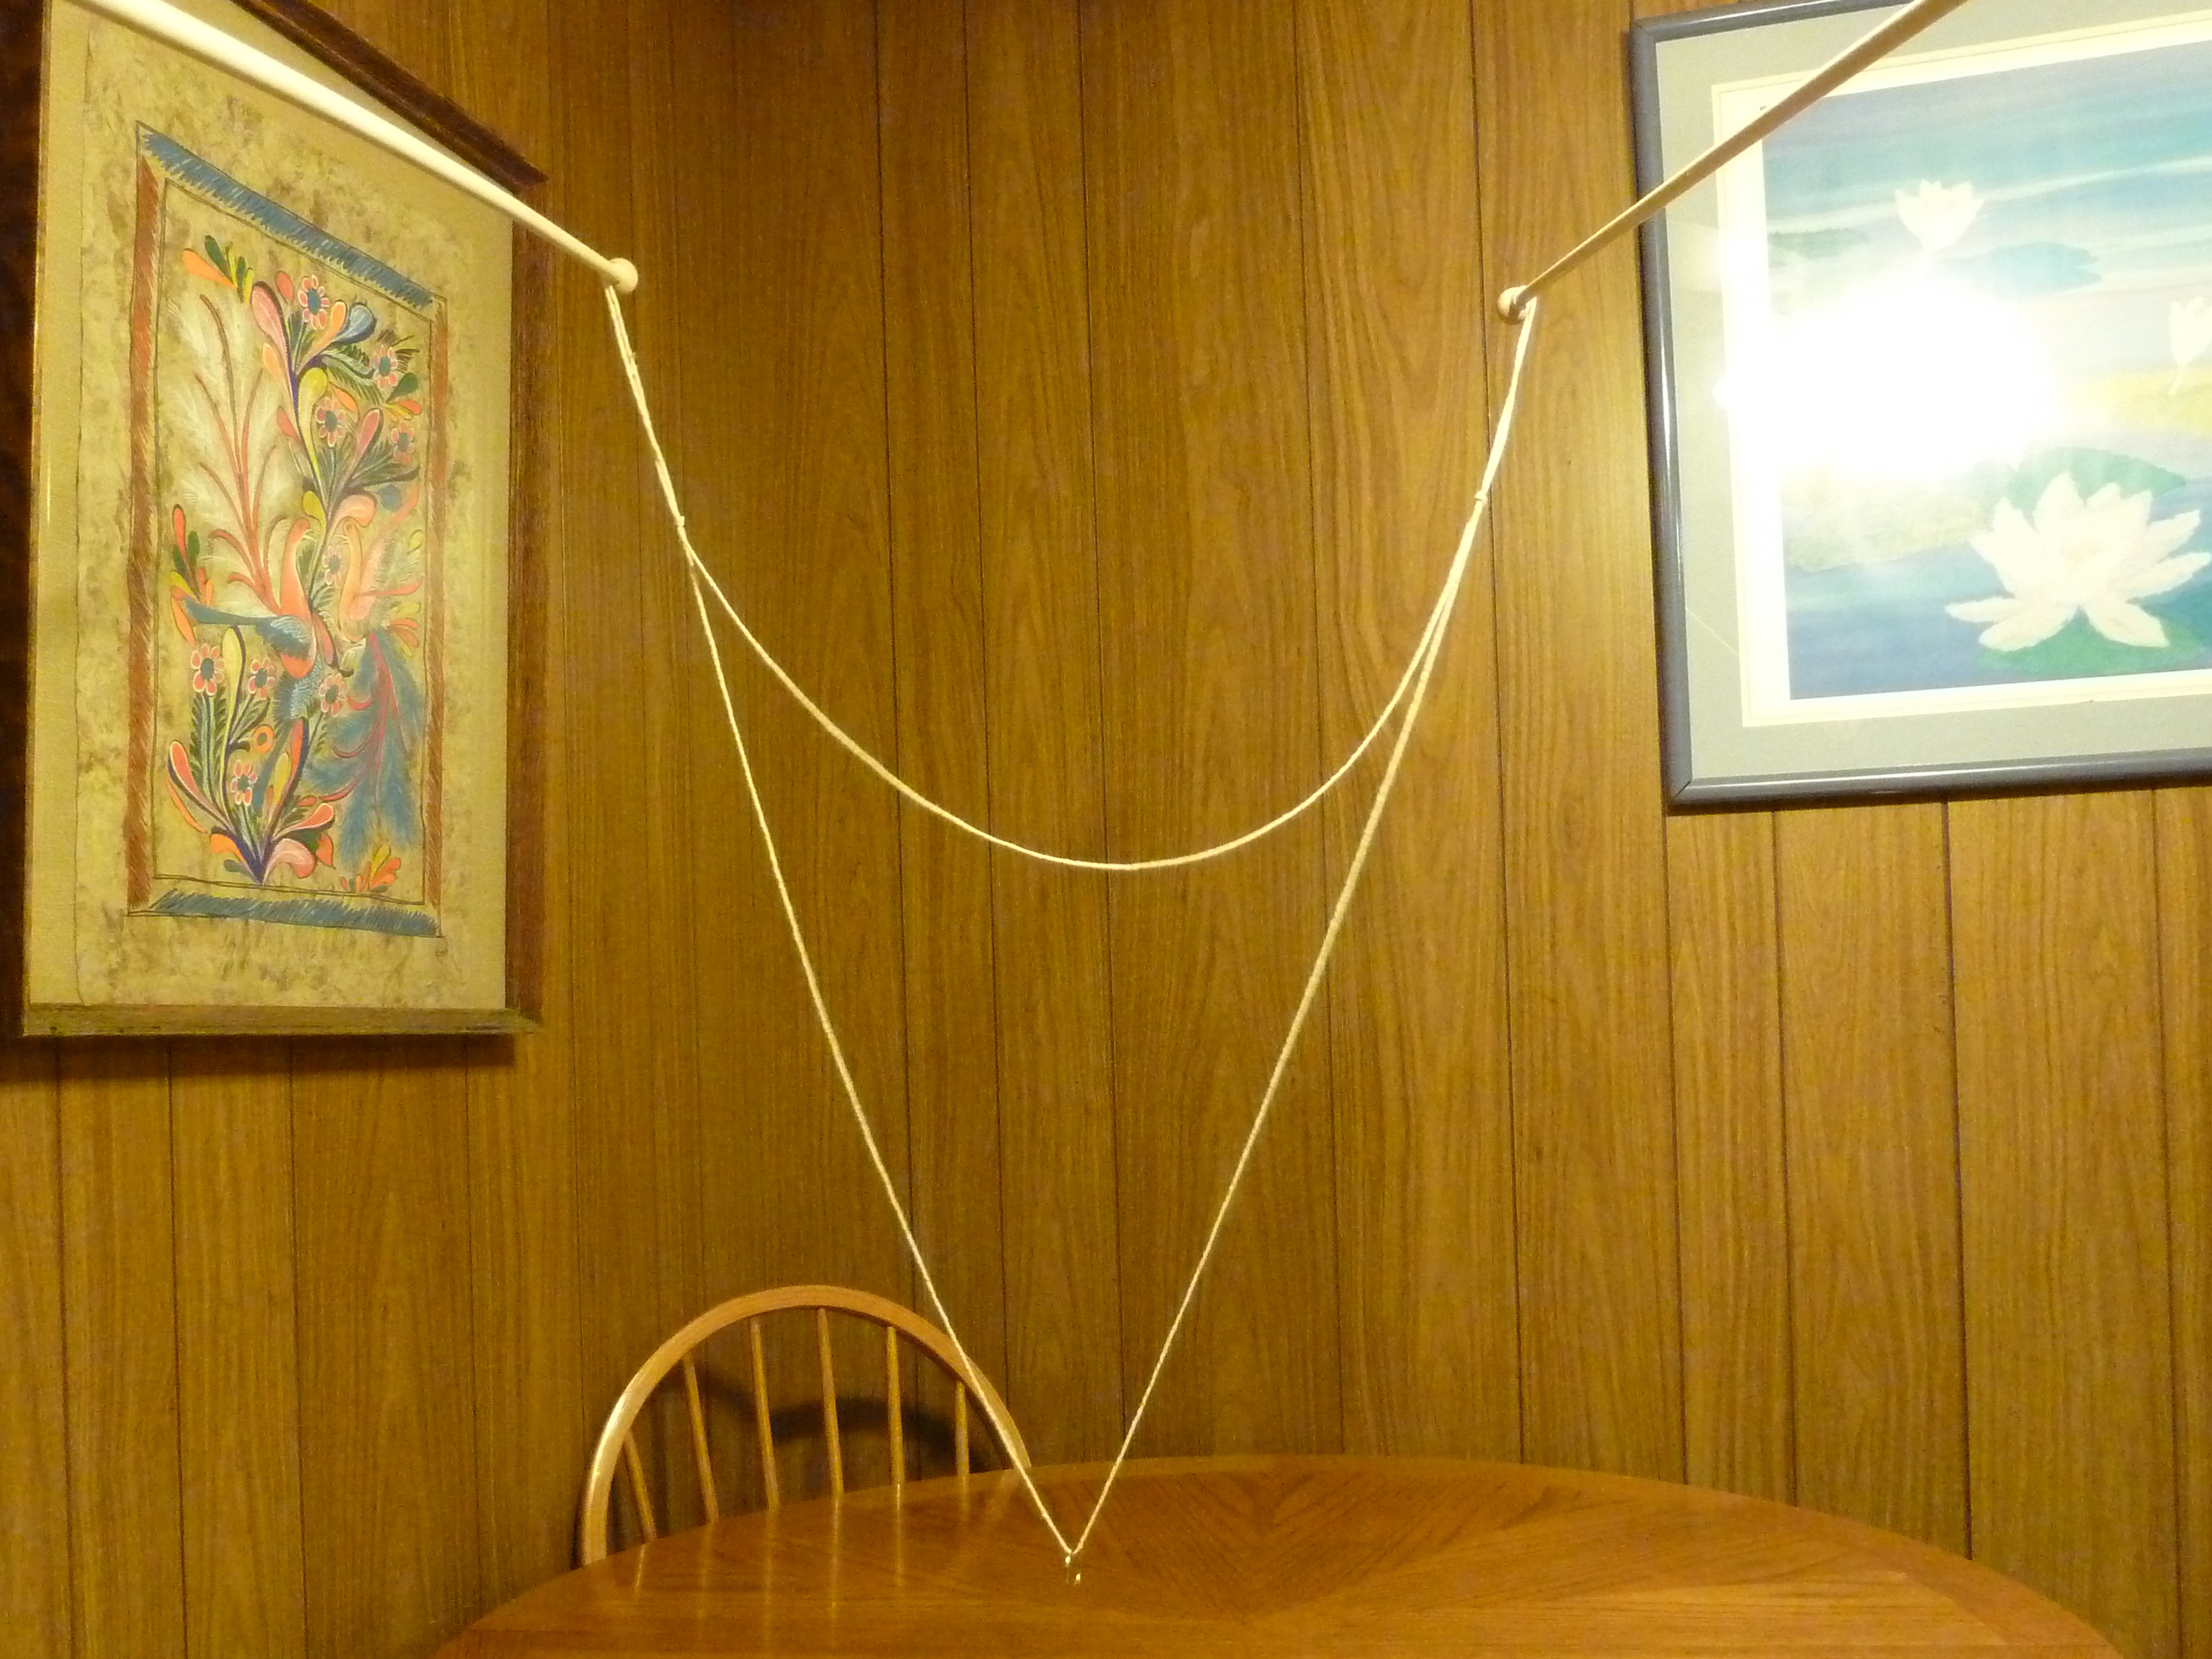
+ | [[File:Brianl_dipstix_DSCN4734.JPG|thumb|300px|This homemade wand has the loop directly connected to the handles. Find out how to make it [[Making_a_Super_Simple_Tri-String|here]]]][[File:16FinishedFx.jpg|thumb|300px|See [[User_blog:Glowby/Building_a_Simple_Tri-string_Bubbling_Rig|this article]] to learn how to make this wand.]]Some tri-string wands have the loop connected directly to the handles. Some "direct connect" wands have an eyehook, clip, swivel, or some combination directly connected to the wand to which the loop is attached.{{ClearFloat}} |
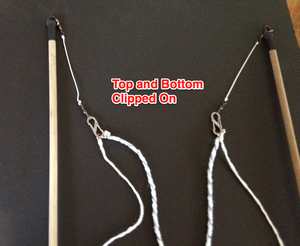
[[File:20130202_3880_modular_top_and_bottoms_clipped_REDUCED.png|thumb|300px|This [[Modular_Tri-String_Loop| modular]] setup has a leader terminated with a swivel and an s-biner.]]Some tri-string wands have a leader (usually with a clip of some sort) to which the loop is attached. There are some advantages to using leaders. When using a leader, you do not need to put the wand tips directly in the bubble juice which reduces the foaming that can happen after repeated dipping. Leaders put distance between the wand tips and the bubble (thus reducing the likelihook of the wand popping the bubble). Leaders can be made any length and can reduce the amount of bending that you need to do when dipping. Lastly, they allow you to lay the handles on the ground while the loop is still in the bucket.{{ClearFloat}} |
[[File:20130202_3880_modular_top_and_bottoms_clipped_REDUCED.png|thumb|300px|This [[Modular_Tri-String_Loop| modular]] setup has a leader terminated with a swivel and an s-biner.]]Some tri-string wands have a leader (usually with a clip of some sort) to which the loop is attached. There are some advantages to using leaders. When using a leader, you do not need to put the wand tips directly in the bubble juice which reduces the foaming that can happen after repeated dipping. Leaders put distance between the wand tips and the bubble (thus reducing the likelihook of the wand popping the bubble). Leaders can be made any length and can reduce the amount of bending that you need to do when dipping. Lastly, they allow you to lay the handles on the ground while the loop is still in the bucket.{{ClearFloat}} |
||
Revision as of 18:12, 2 July 2013
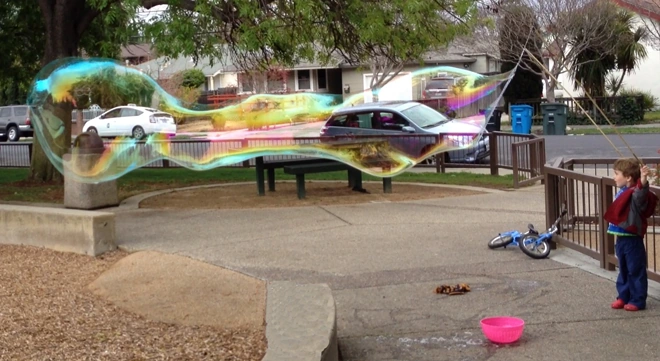
Even a 3 year-old can make giant bubbles with a tri-string wand.
Tips for getting Started
Tri-string wands (also called tri-wands) can be simple or complicated. They are available commercially, but it is quite easy to make them.
To get started all that you really need are:
- Two handles
- A "loop" of material (that we call a wick)
- Bubble juice
- A dipping container
Bubble Juice. The guar-based bubble juice recipe is a great recipe and very easy to mix. For most people, the ingredients are easily found locally. You will find many more recipes on the main Recipes page.
Wand. A very simple wand can be made from chopsticks (or dowels or bamboo gardening stakes) and a strip of t-shirt material (best to use a new one), cotton shoelace or cooking twine. Click here for directions for a super-simple tri-string.
Garland wands. So-called Garland Wands are a tri-string "relative" that can create many bubbles at once.
Simple tri-wand projects:
- Super-simpler tri-string . DipStix-style wand made from chopsticks (or bamboo garderning stakes or dowels) and a t-shirt.
- Glowby's simple tri-string. This is an elegant simple design made from dowels and cotton twine.
- Edward's Simple Tri-string overview. Some general instructions for making a first tri-string.
Using A Tri-String
[This section needs expansion.]
The basic technique for using a tri-string is simple.
- If there is wind, stand with the wind at your back.
- Hold the wand tips together and dip the loop into the dipping container.
- Keeping the wand tips together raise the loop out of the container keeping the tips together (very important).
- Raise your arms (with the wand tips still together) and spread them. Generally, you want to raise the wand tips above shoulder or head level before starting to spread the wand.
- If there is no wind, walk backwards (being careful not to bump into anything).
- Bring the wand tips together to close the bubble.
If the wind is brisk, keep the tips together and start walking with the wind before you start spreading the wand tips. This reduces the wind speed relative to the bubble.
Find more tips in the main Tri-String Article
Loop Materials
Here are some easily available (at least in the USA) materials for tri-string loops that are quite effective. Most of the videos were made with tri-string loops made from one or more of these materials. For more about loop materials see the Wicks article.
In general, it is often helpful to wash your twine with laundry detergent and letting it thoroughly dry. This will pre-shrink the material and help break it in -- as well as remove any sizing that might adversely affect them. Some people pre-wash their materials in a washing machine (taking care to take precautions so that they do not become tangled during washing).
- Cotton (cooking) twine. High-quality cooking twine works very well. This excellent wick material can be improved with a technique called soda washing. The cooking twine found at Bed, Bath and Beyone tends to be very effective. Other cotton twine can work well also. While a single strand of twine can be effective, you can increase the size potential dramatically by usin 2 to 4 strands for the top-string. You can make custom cord easily or simply carefully measure the top-strings so that they are the same length. High-quality cotton twine is HIGHLY recommended for your first loop -- and may be your last loop as it works so well.
- T-Shirt Yarn. Lightweight unused cotton undershirts (Hanes and Fruit-of-the-Loom are known to work well) can provide an excellent material. You can cut a loop from an extra-large men's undershirt by cutting across the bottom as shown in the article Making a Super Simple Tri-String. This will supply a loop with an approximately 32" top-string which can make tubes well over 25 feet long in the right conditions with the right bubble juice. You can make long strands by using the spiral cut technique.
- Jute twine. Jute twine has excellent capacity and releases the juice well. It tends to be very fuzzy which can foam up the juice.
- Mop Yarn. Some types of mop yarn are the preferred materials of many bubblers. Not all mop yarn is created equal. See the Mop Heads article for recommendations.
- Diamond-braid cotton cord (with core removed). Some (but not all) diamond braid cotton cord is very effective. Read more about it in the Wicks article.
For getting started, a 32" top-string loop is a good size. With the right material and juice, you can create tubes 40 feet or longer in the right conditions, and they are easy to maneuver. 48"-long handles would be a good length for such a loop.
Some people start with 48" loops, but these can be trickier to work with if it is breezy or the conditions are not good.
Doubling up. While many avid bubblers make custom twisted cord (it is suprisingly easy to do), you can easily increase the capacity of your loops by adding an extra length of material to your top-string. The top-string's capacity has a much bigger impact on the bubble size than the bottom string's. (See [Composite Tri-String Loops] for more about this.) A 36" top-string loop made from a single strand of high-quality 100% cotton twine can make pretty huge bubbles. Adding another 36" length of the twine to the top-string will increase the size potential dramatically. As long as the added strand is the same length as the loop's existing top, the wand will be well-behaved. If there is a size mismatch, the only drawback is that you may sometimes get extra bubbles riding on the main bubble.
Loop Size and Dimensions
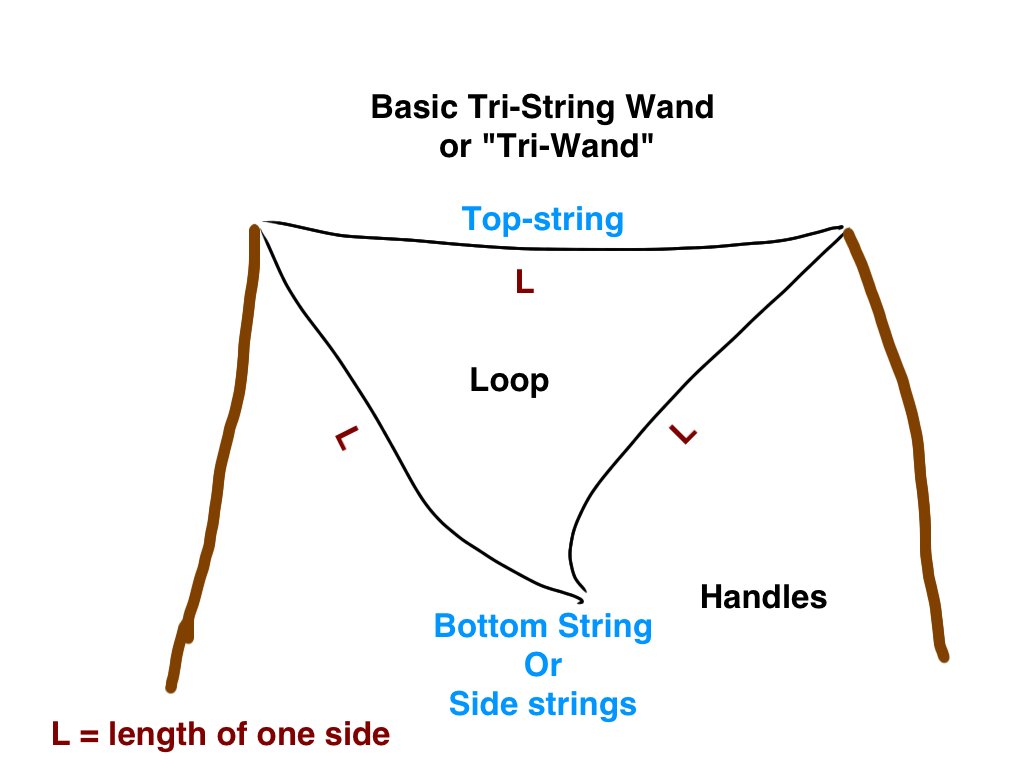
If you think of the bubble loop as a triangle whose base is on top, you want all sides to be about the same. The base (which will actually be on top) is called the top-string. The part that hangs down is often called the bottom-string or down-string or the side-strings.
The loop can be made from one, two or three lengths of cord (see Loop Styles, below). Typically, one uses just one length of wick material tied into a loop, or two lengths: top-string and bottom string. If using two lengths, the bottom string should be twice the length of the top. (Some people prefer slightly different ratios, but most stick to the "classic" design.)
Loop Styles
There are many ways of making a loop. See Tri-String Loop Styles for ideas.
Attachment Styles
There are many ways of attaching the bubble "loop" to the handles. There are two main styles (with many subvariations).
This homemade wand has the loop directly connected to the handles. Find out how to make it here

See this article to learn how to make this wand.
Some tri-string wands have the loop connected directly to the handles. Some "direct connect" wands have an eyehook, clip, swivel, or some combination directly connected to the wand to which the loop is attached.

This modular setup has a leader terminated with a swivel and an s-biner.
Some tri-string wands have a leader (usually with a clip of some sort) to which the loop is attached. There are some advantages to using leaders. When using a leader, you do not need to put the wand tips directly in the bubble juice which reduces the foaming that can happen after repeated dipping. Leaders put distance between the wand tips and the bubble (thus reducing the likelihook of the wand popping the bubble). Leaders can be made any length and can reduce the amount of bending that you need to do when dipping. Lastly, they allow you to lay the handles on the ground while the loop is still in the bucket.
There are many variations of these methods: many different ways to attach the loops or leaders to the wand. See the Tri-String Gallery for ideas. See also Thommy's related blog post.
See also the rigging category articles.
Attachment Points
If bubbles become a hobby, it is often handy to be able to change loops. There are many ways of doing this. Whether you use a wand with a leader or one without, it is often nice to have a clip of some sort. Fishing swivels, s-biners, lanyard clips, and various other types of gear can be used to make it easy to attach and remove the loop.
To facilitate attachment, you can attach split rings or jump rings (or some other type of little ring or loop) directly to the loop itself that you slip onto your wand's clips. Or you can attach short leaders to your loops that have split rings or other ring/loop that slip onto your wand's clips.
See Also
See also:
- Tri-String Wands
- Composite Tri-String Loops
- Modular Tri-String Loop
- The Tri-string category page
- Tri-String_Gallery
- Garland Wands. Garland wands are a tri-string relative that can create hundreds of bubbles at once.
- NoDip Wands